It has been a whirlwind 6 months and I cannot believe all that is happening in the world. We have been on lockdown in Washington, but have been doing our best to social distance and still get work done. We finished up our 1928 Bungalow and had renters moved in by February 1st. A couple weeks ago, we also purchased another bungalow... but this one is across the street from the previous house and was built in 1910. I will write a separate post for that house!


We took many loads of material to the dump. My truck has been a lifesaver during these renovations.


We always love leaving little notes for the future owners to find. We have done this in all of our homes that we have renovated.


The bedrooms had original baseboard trim, so we left that... but added quarter round at the base. We chose not to remove the popcorn ceilings and just paint Kilz over them. We had our painter use the same Sherwin Williams grey that we use in all of our rentals and we painted the trim white.


We purchased new butcher block counters for the kitchen and a new vanity for the bathroom.


This was the day that the painter did the first coat. I almost changed my mind because it looked so bright! I hated it, but I trusted that with the white trim, green grass, and picket fence... it would break up all of the bright yellow.

The previous owner put in a gas fireplace, so we opted to keep it, but paint the wood white to go with the rest of the house.


We fostered a couple dogs during this time :) This is Rocky and he was adopted by a nice family with other shih-tzu siblings.


We had the property scraped down as it had heaved over the years. We took away a few trailers full of material to make it all level. This is the backyard after scraping. The yard when we purchased the house was full of goat heads and weeds.


The 1928 Bungalow turned out to be a great purchase! We snagged it for $79,000 and were able to fix it up and get it running for probably close to $20,000. We hope to run the numbers soon to get an exact amount, but we are very happy!
We initially focused on the interior of the house to get it ready for renters and after they moved in, we focused on cleaning up the yard. This house was purchased from an estate. The man had passed away and the family was selling it. The home was smoke damaged from the man smoking and needed a lot of love. Before we toured the house, a couple toured it right before us. They walked in and as we waited outside, about 30 seconds later... they came running out coughing and disgusted by the condition. We knew we had a keeper when that happened :)
Here are some in progress pictures!
For reference, this is what the house looked like when we purchased it on October 18, 2019:
The house had asbestos siding which we decided to take the risk and remove. It ended up being the best decision we made for this house!

This is what the living room looked like on the first night. It had rough decorative wood paneling that wreaked of smoke. We knew we had to tear this all down, but were worried about what we would find behind it. It ended up being fine and the house smelled significantly better once we removed the wood that had soaked up all of the smoke for years.

The house had some carpet, but it had holes and missing sections. Underneath the carpet was linoleum. We chose not to risk more exposure by ripping up the linoleum and we scrubbed the old flooring and placed vinyl flooring on top.


We took many loads of material to the dump. My truck has been a lifesaver during these renovations.

We used the same flooring we used in the basement at the last rental because we love it. It is great for rental properties as it is waterproof and looks like wood flooring. We have had standing water on it for a day and it does great.


We always love leaving little notes for the future owners to find. We have done this in all of our homes that we have renovated.


The bedrooms had original baseboard trim, so we left that... but added quarter round at the base. We chose not to remove the popcorn ceilings and just paint Kilz over them. We had our painter use the same Sherwin Williams grey that we use in all of our rentals and we painted the trim white.

We added all new kitchen cabinets. The previous kitchen had only one base cabinet for the sink and was a mess. This kitchen went from no storage to a great space!


We had the Lowes cabinet designer help us to create the most efficient use of space for this small kitchen. It made a huge difference!

We refinished the original claw foot tub that had peeling paint.


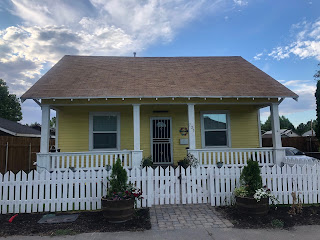
I wanted the house to be yellow, so I tested a few different options. We went with the one second to the right.

We purchased new butcher block counters for the kitchen and a new vanity for the bathroom.


This was the day that the painter did the first coat. I almost changed my mind because it looked so bright! I hated it, but I trusted that with the white trim, green grass, and picket fence... it would break up all of the bright yellow.

The previous owner put in a gas fireplace, so we opted to keep it, but paint the wood white to go with the rest of the house.

We reinstalled the claw foot tub.


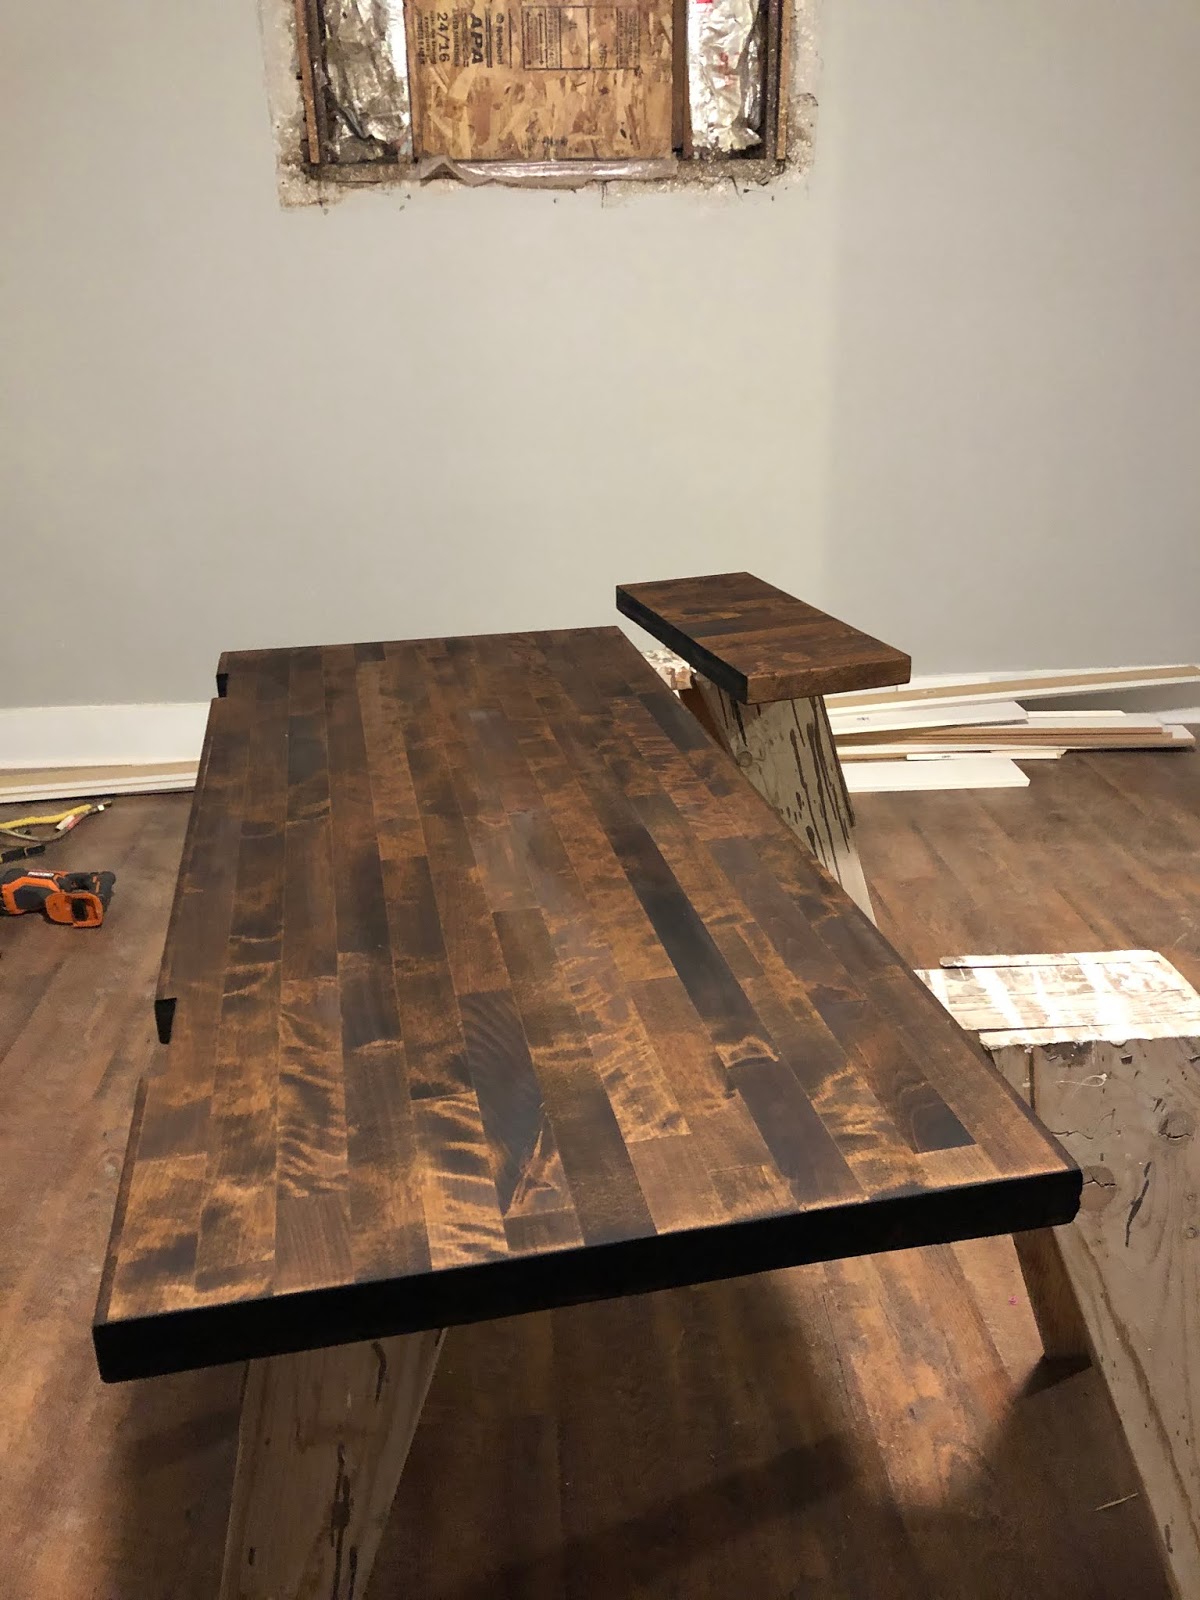
We cut the countertops to fit.

This night we removed all of the rotten wood windows. I was sad not to be able to keep them, but they were crumbling. This is the back enclosed sun porch.

We cut the hole for the sink.

We stained the countertops Dark Walnut.
We had new windows installed. The house had old vinyl windows that were not fully functional.


This picture shows just the body of the house painted. It got too cold too fast, so our painter was not able to finish. We still had to repair the porch and railings.

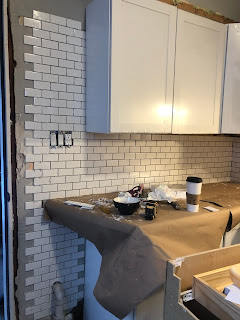
We chose to use subway tile again as the kitchen backsplash.

We had a new porch door installed to match more of the craftsman style and to increase efficiency.

We fostered a couple dogs during this time :) This is Rocky and he was adopted by a nice family with other shih-tzu siblings.
We chose to take the tile to the top of the cabinets.


We added trim to the top of the cabinets.


We installed all new blinds.


We repaired some siding that was missing.

We had the property scraped down as it had heaved over the years. We took away a few trailers full of material to make it all level. This is the backyard after scraping. The yard when we purchased the house was full of goat heads and weeds.


We had new windows installed on the back porch.

Installed the kitchen sink

We installed a new dishwasher.


When we were having the land scraped, we had him rip up the old stairs and sidewalk. They were broken, so we chose to install a paver path like the one we did for our backyard patio.

We replaced the porch as it was crumbling, not level, and not safe.


The back enclosed porch was never insulated, so we added insulation and new siding.


We added a new back door with blinds for privacy.


The porch columns were crooked and rotting, so we worked a bit to clean them up. They are not perfect, but it is an improvement.

We had sprinklers installed and we put seed down after aerating.


We added trim to the back door.

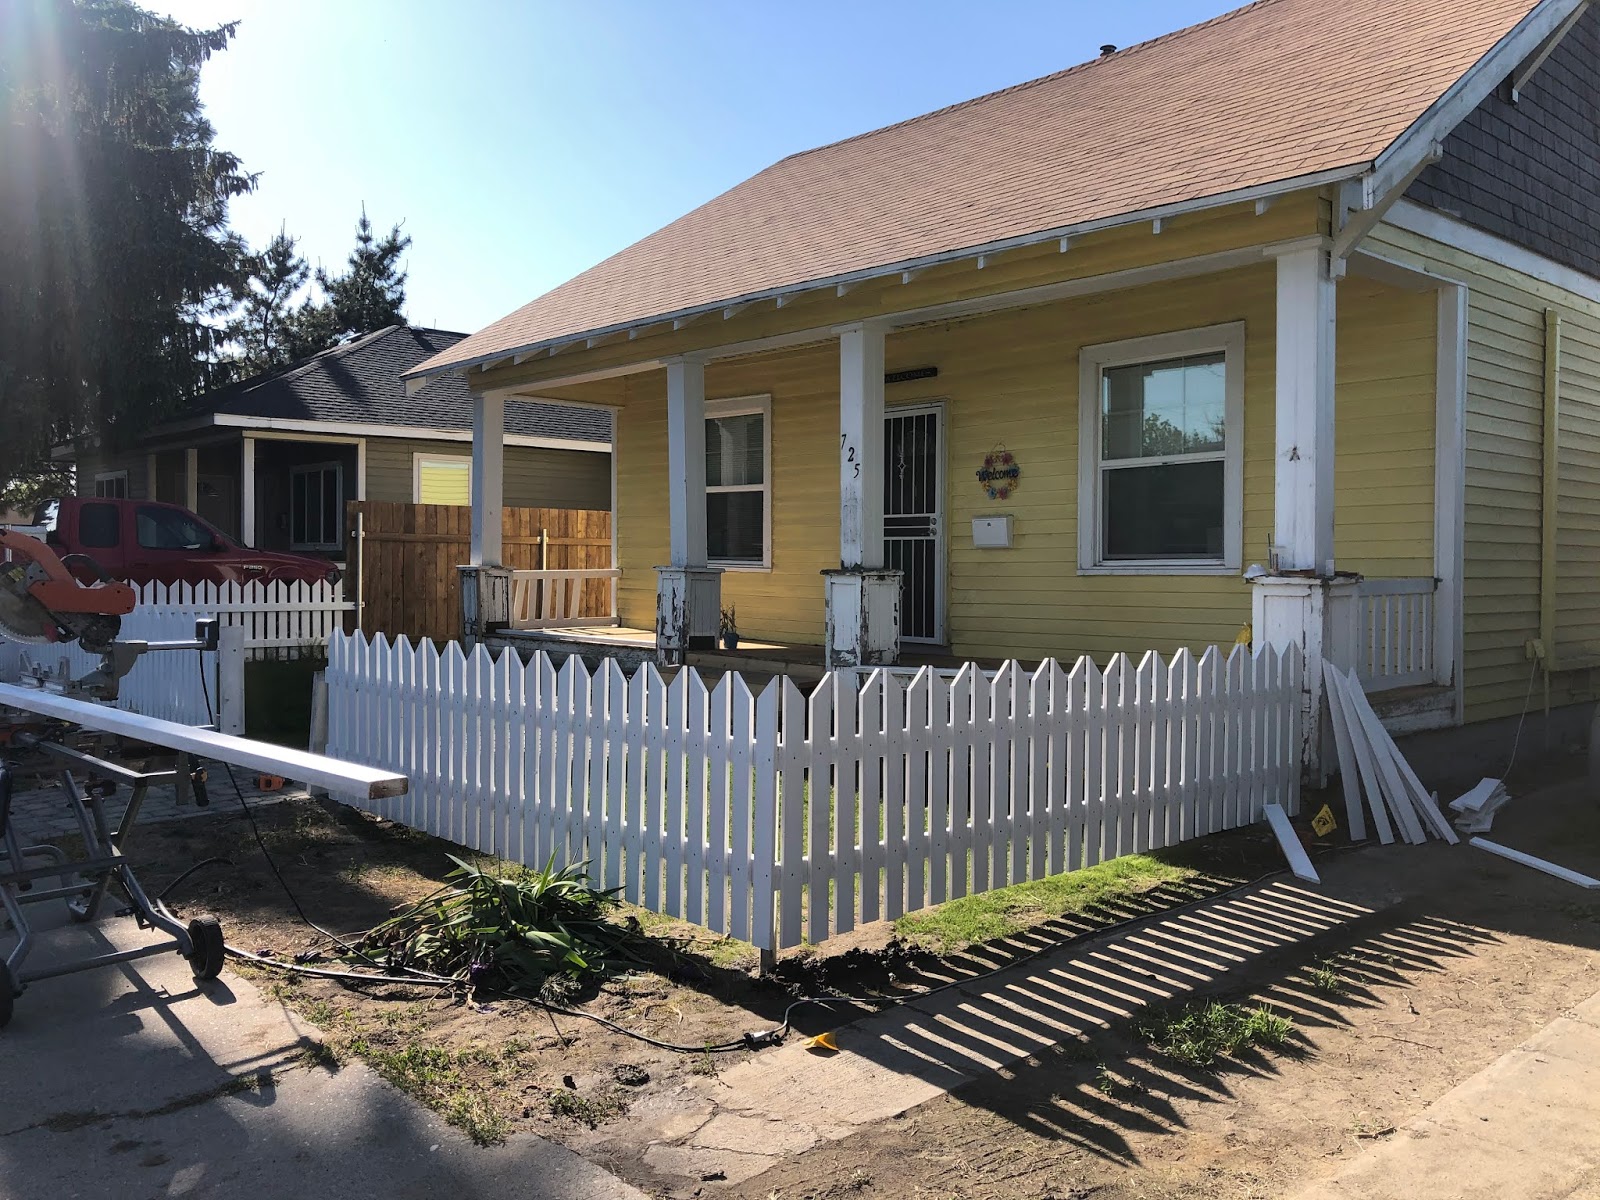
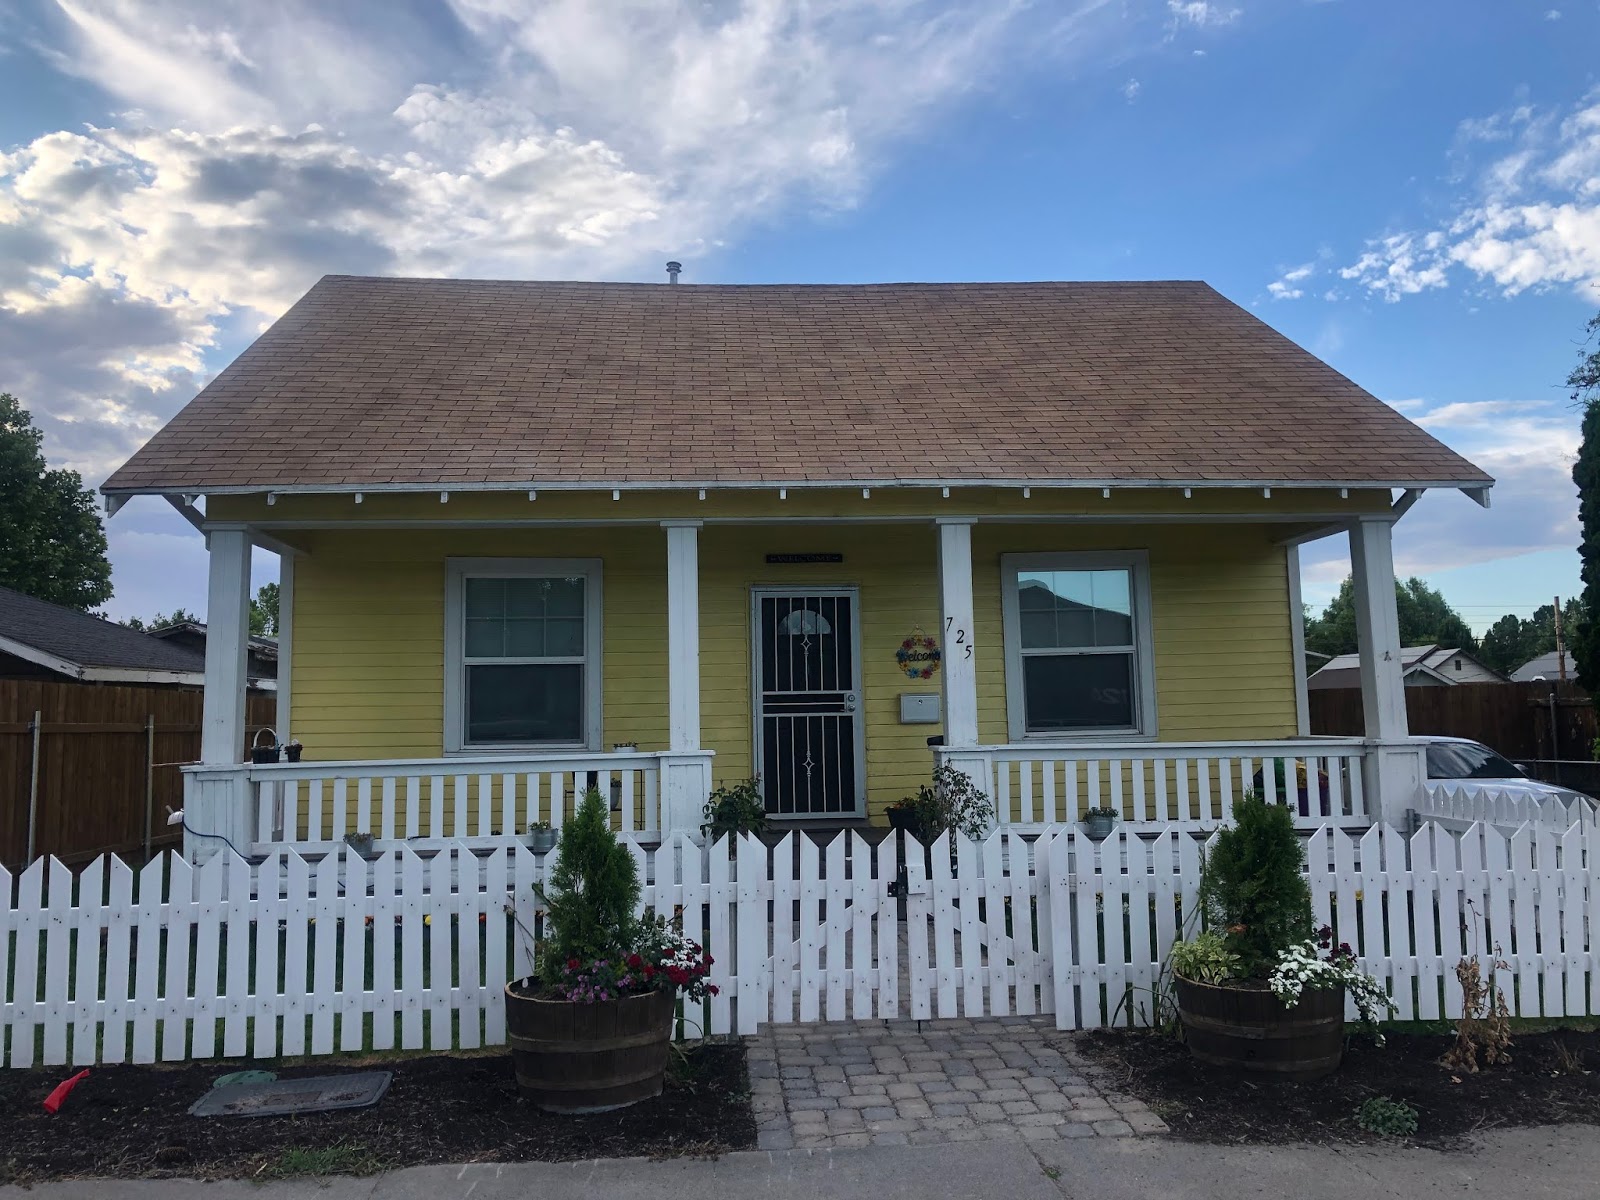
We installed a privacy fence along the side yard and a picket fence in the front.

We had to replace the railings. The old wood was rotten, so there was no salvaging it, but we did our best to replicate it.

The seed started to grow in, we built new steps, and our renters began their garden.


The picket fence began!


We finished the gate for the picket fence.

The railings were finished!

We added some compost to help the grass and level some lower areas.

The grass started to fill in and our renters garden is looking great!

We added wine barrel planters and plants from Costco to frame the walkway.
We are now just maintaining the house and yard. It was a great project and has been a lot of fun watching it transform. Two weeks ago, we were able to close on a property across the street and are now working on it.
It is indeed transformed. Amazing job. I can't imagine finding any house for $79K. In the areas I've lived you can't even buy land for that much.
ReplyDeleteYeah, around here it’s getting harder to find properties at that price too... We got lucky with this one!
Delete